In which I blog about my miniature wargaming and whatever else takes my interest!

In which I blog about my miniature wargaming and whatever else takes my interest!

Sunday, April 29, 2012

More SYW Baggage

So last year at Hotlead I bought some second hand Museum Miniature wagons for $10.

Before

Before
You recall I didn't like the solid wooden wheels and the rather awful paint job (I can say that because I did the awful paint job some 25 years ago). A few months back I finally contacted Dave at Museum and ordered some spoked wheels and extra draft horses.

In between working on more Sudan campaign stuff for a customer, the distance learning component for my latest CIC course and trying to find better employment, I refurbished the remaining wagons; replacing wheels, adding more draft horses and giving them a complete repaint. Some of the pins did break off, so I had to make axles from wire and glue those in first. But nothing a few minutes with a file and some epoxy couldn't get sorted.

syw baggage 002
Refurbished covered wagon

The open topped large cargo wagon also got an Essex driver (who was extra from Patrick's Thirty Year's War army). I used pliers to turn up his floppy hat and make it a tricorne. I also filled the rest of the box with some bags made from greenstuff and some extra bits of WW2 tank stowage.

syw baggage 004
Refurbished open topped wagon

The engineer's wagon and large barrel wagon didn't have room for drivers so (inspired by something I saw on some other blog but I can't remember where) I added troops guiding the horses on foot. I used a Lancashire Austrian jaeger and painted him as a pioneer for the pioneer wagon, and then a couple of musketeers to guard the barrels of beer.

syw baggage 001
Pioneer wagon

syw baggage 005
Beer wagon
I suppose I should have painted the pioneer and beer wagons a nice Austrian ochre, but I hadn't thought of using spare infantry figures until after I'd painted the wagons.

So here's the whole lot refurbished at last and ready to hang about in the rear at the next battle:
syw baggage 006
The complete group refurbished at last
syw baggage 007
That's better!

The bases are quite thick, because I was worried that such large bases would warp if made with my usual artist's matt board.

These last four have now doubled the size of my baggage train (at least for the Austrians). I may need to find someone to play out a rearguard action now. I think my small Austrian force is big enough to act as a rearguard.

Sunday, April 15, 2012

Shameless Photo Op

As I said previously, we raised some money at Hotlead 2012 and donated $500 of it to the Army Cadet Corps I work with. Apparently just handing a cheque to the lady who looks after our finances during Sports Night isn't good enough. So a couple of weeks later when we were all back into proper uniforms the CO had me re-enact the presentation.

Monday, April 9, 2012

Random IABSM Game

I had thought that my friends would all be busy over the holiday weekend so hadn't tried to schedule a game, but Patrick was available Saturday night and wanted to blow the dust off his early war French.

We decided to try the random scenario generator from I Ain't Been Shot, Mum! v.3. It worked quite well. We rolled up some terrain (I rolled 3 and Patrick rolled 5, so I placed 3 large terrain pieces; a hill, a town, and a large hedged in field, and Patrick alternately placed 5 small pieces, a couple of woods and a few scattered buildings, I suggested we throw in a stream as one of his choices) and then randomly rolled up scenario 6 "Counter Attack". Patrick rolled to be the defender and chose the table edges. This scenario has the defender with three platoons (he picked 2 rifle and one antitank gun platoon) in the center of the table. His reinforcements (3 more platoons including 2 armour) arrive after the 5th turn of a special card.

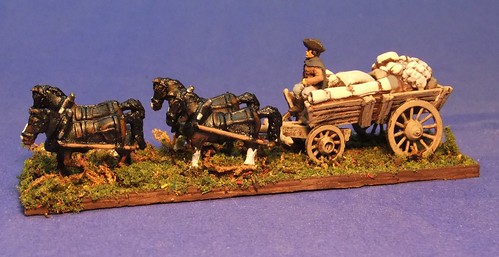
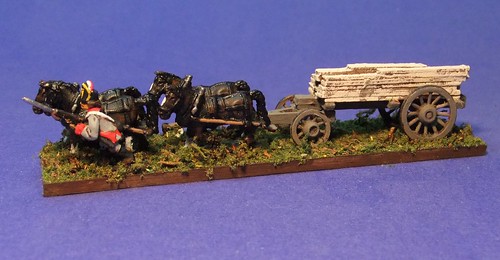
Meanwhile I got to come on with 5 platoons including 1 armoured choice. I opted for my zug of 5x Pz38(t)s going for quantity over quality. Although maybe I should have taken the zug of 3x PzIVs with their 75mm guns instead. I also took two infantry platoons supported by a 75mm gun section and a platoon of Pak36 antitank guns. I was going to take a MG platoon then noticed that my Company HQ for 1940 already included 4x MMG teams.

The hardest part of the setup was sorting through the cards to build the game deck, and that will be aided by being better organized. When clearing up this time I sorted the cards by type and into Axis and Allied piles to help find the cards I want more quickly next time.

We got started about 9, were rolling dice by 10 and stopped at 1 AM. We could have played longer but it was late. Patrick's reinforcements were starting to get engaged and could have severely mauled one of my infantry platoons. But I had the town and he wasn't going to get me out of it.

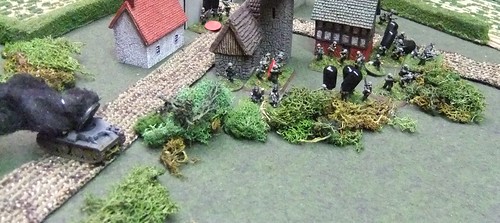
Early moves. French around town, Germans coming on from top of picture.
I sent one platoon and the infantry guns up the other side of the river, to try and secure the bridges and distract the French.  Patrick revealed a full platoon with two 25mm AT guns in the field. My75mm IGs laid a spectacularly devastating initial salvo knocking out one AT gun, but then failed to hit anything else for the rest of the game.
My first platoon and the infantry guns across the river engage the French in the field.

Meanwhile the rest of my force moves on the town.
 Meanwhile I got my 2nd platoon with the company HQ MG34s in support up close to the town. They started firefighting with the defenders of the houses. After pinning the French with superior weight of fire I charged in with two sections, bundling the French out of the first house.
2nd platoon storms the first house.
I then repeated the maneuver on the second house. The Company HQ MGs then moved up and drove the defenders of the third house and the church out with weight of fire.

Panzers flank the town, the French At gun got one shot off then died under a hail of counter fire.

First platoon crosses the second bridge
My second platoon then carried on the assault into the church yard and drove out what was left of the French. Clearing the town cost them about 15 casualties. You can see them in the picture below around the church.
French armour score a kill

That's about where we stopped. My panzer Zug was engaging the Char B's coming up the road, getting a mobility kill on one. Patrick's other armour platoon of S35s was veering off to take on my bridgehead where I was trying to set up the 75mm IGs. The blind card you can see behind the panzers is my platoon of Pak36s trying to move up to deploy beside the 38(t)s. The penetration on the 37mm guns isn't much but sometimes sheer weight of fire results in a kill. And I'd have the Char B's outgunned 7:3.

Blitzgame with Patrick 009
French armour engages

Or not. Whenever I rolled a really good penetration Patrick would roll equally well for his armour saves. Oh well.

Blitzgame with Patrick 010
Panzers in a gunfight

Where are the damned Stukas when you need them?

But we both thought the random scenario generator worked quite easily and resulted in a fairly balanced and challenging game. The force selection also helped reduce the overgrown OrBats that result from the wanting-to-use-everything syndrome.

[Edit: I've got a new flickr account sorted and have added the last few pictures that Blogspot wouldn't let me -10 Apr 2012]
Blitzgame with Patrick 012
German 2nd Zug secures town

Blitzgame with Patrick 011
French situation at game's end- notice all the shock on the remnant's of the French 1st plt

Friday, April 6, 2012

More Excitement! The Battle for Liberation begins.

The long awaited first supplement for I Ain't Been Shot, Mum! (3rd ed.) has finally been released in pdf format. I ordered, downloaded and had read most of it within a few hours of reading the announcement on the Too Fat Lardies Yahoo group. It is well worth the GBP10.00 price tag with 99 pages of well laid out, densely packed order of battle and vehicle spec goodness for your late war western European theater games.

This supplement covers British and Commonwealth forces, Americans, Free French, Germans and Italians (of all political persuasions). Each country has vehicle and troop specs and pages giving the organization and supports appropriate for a basic rifle company, motor/mechanized infantry company, armoured company, armoured recce company, airborne (parachute and glider if appropriate), commando/ranger units, mountain troops, volksgrenadier and volksturm units for the Germans. The significant changes in the American armoured infantry company from 1943 to 1944 cause there to be two separate entries.

The more armour friendly nature of 3rd edition IABSM means you can actually field a complete armoured or armoured recce squadron. Now the player has the info needed to do that within the game context. I knew I wanted to build my Shermans up to squadron strength... now I can!

The graphics and layout are greatly improved over the supplement from the 2nd edition. There is lots of use of boxes and colour to help you organize your support units into what would be an appropriate level of support for your company and what would be rare or off board. The amount of information is also greatly increased. So much so, that Richard Clark has decided to split the late war into two books. I can only wait with baited breath for the Eastern front supplement. I hope the supplements for the early war Blitzkreig/Barbarossa years aren't too far behind!

I'm going to contact Staples on Monday and see how much it will cost to get 99 pages colour printed and bound.