
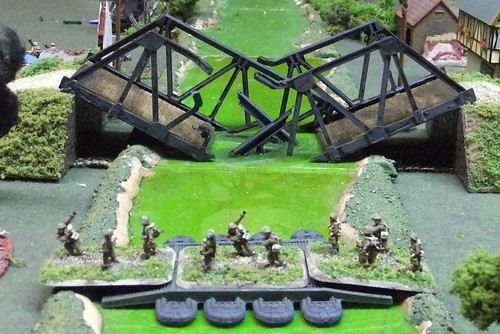
The other week on a day off I felt the urge to make some terrain and got out my Dremel tool. With a bit of careful positioning of sections on the original embankments to get the angles for the cuts right I quickly hacked things apart and used a butane barbecue lighter to soften and bend the broken ends. I then glued some sections of road bed on and gave it a quick paint. Left over off cuts of girder were glued to clear plastic to make debris jutting out of the river. The result is this:
 |
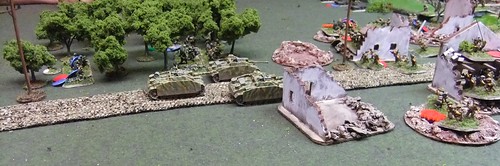
| The Canadians reinforce the fragile bridgehead. Note the Kingtiger destroyed in the last game |
The Canadians have two rifle platoons, with two Vickers MMGs and two 6 pounders and a carrier patrol over the river. A third rifle platoon is coming up to cross. Giving supporting fire from across the canal is a troop of Shermans. There is also a FOO. Mike failed his die roll for air support. Presumably bad weather has grounded the fighter bombers that gave me such a headache in last year's game!
The Fallschirmjaeger are attacking with two rifle platoons and two platoons of StuGs supported by an MG42 MMG platoon, a 75mm Infantry gun section (I rolled to randomly decide between them or the sexier 150mm recoilless rifles), a FOO calling in 120mm mortars and the company HQ with it's own 80mm mortars.
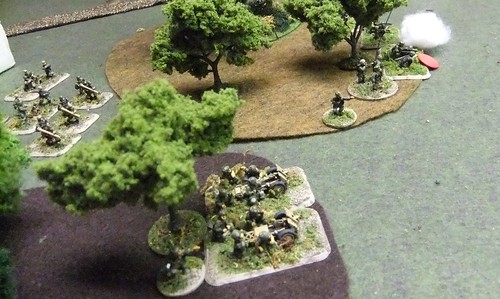 |
| German base of fire |
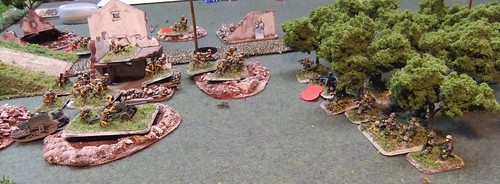 |
| FJ assault from orchard |
Mike put both his rifle platoons with the 6 pounders and Vickers guns in the shelled houses at the foot of the blown bridge. The carrier patrol covered the right of the pontoon bridge.
 |
| StuGs give close support |
Brian was not really able to develop a full strength assault and pushed into the edge of the village with one section who easily drove out the pinned Canadians. But they were in turn counterattacked and driven back with heavy casualties. A second attack retook the rubble. The one platoon of StuGs formed on the German left and engaged the carrier patrol and the Shermans over the canal. The long range and small size of the carriers enabled them to survive for far longer than was thought possible. The second StuG platoon pushed up the road to give the Fallschirmjaeger some close support.
At this point the Canadian FOO was finally able to activate his artillery support and brought in a battery of 25 pounders onto the StuGs causing a mobility kill and lots of shock. The third rifle platoon was also able to get across the pontoon bridge and reinforce what was left (which wasn't much).
It was by now 0230 hrs and time to wrap the game up. The FJ could still crush the bridgehead with their weight of armour but their rifle platoons had taken 50% casualties. I think the battle would be decided by the FOO and the HQ set up by the pontoon bridge; how quickly could they get more reinforcements up and how much artillery could the FOO bring down to cordon off the perimeter?
To tweak the scenario I would have added a special card to randomly decide if some more Canadians show up to reinforce. Some armoured car sections or carrier patrols that had been scouting along the canal could have come back or more Shermans arrive to give more supporting fire.
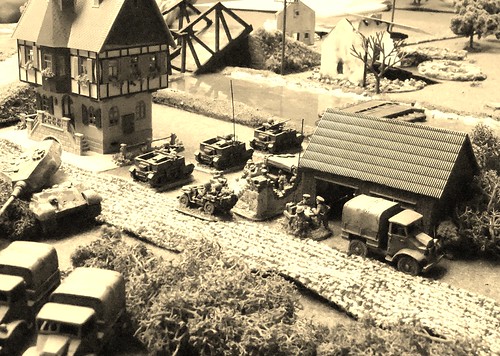
Figures are all 15mm (a mix of Peter Pig, Battlefront and Old Glory) from my collection. We used I Ain't Been Shot, Mum 3rd edition rules with the Battle for Liberation army lists.


It was a fun game and an interesting scenario, reminded me of some of the Italy bridgehead battles I have read about.
ReplyDeleteThanks for hosting James.
An interesting scenario and cracking AAR. Thanks for sharing.
ReplyDeleteNo problem Brian!
ReplyDeleteI was reminded of the last battle in Farley Mowat's "The Regiment" with the Hasty Pee's leading rifle platoons getting overrun and their bridgehead being crushed.
That was a great batrep James. Reads like something out of Mark Zuelkhe. Love the ruined bridge and the atmospheric look of that BW photo. Good stuff.
ReplyDeleteThanks Mike. I have to confess that the BW shot was totally staged. I just wanted an excuse to get that HQ vignette and the group having tea outside the bunker on the table!
ReplyDeleteThat was great, James. You can almost hear the rip of MG42's. I definitely want to give that scenario a try. Visualizing that action made my hair (what's left of it)stand on end.
ReplyDeleteGreat Batrep. It had me looking at figure prices!
ReplyDelete