In which I blog about my miniature wargaming and whatever else takes my interest!

In which I blog about my miniature wargaming and whatever else takes my interest!

Wednesday, April 5, 2023

Martian Close Air Support

After sitting in a tray, covered in a black undercoat for five (?) years, I decided to break my painting hiatus and give this gunship some red and grey dry brushing in about 30 minutes before bed the other night. Red, grey and black are very much the colours of the MCR Navy in the show The Expanse.


I then added some 2nd Cdn Armd Bgde tac sign decals to finish it off it can join my other model. 


Callsign Five-Two is on station


These are Ground Zero Games 15mm Kra'vak Strike Skimmers. But the hull looks similar to my LAV and it makes me think of an assault pod or maintenance pod with added armour and weapons, kind of like an LVT(A)4, to give close support for my power armour Marines in a drop when their orbiting cruiser has gone over the horizon. 

LVT(A)4 somewhere in the South Pacific 

These will be armoured vehicles with Flyer (or maybe Skimmer?), Artillery (that big rail gun should get 48" range!) and Area Effect (the rocket pods on the port side) and Light Armour (to shave some points, also an aircraft shouldn't be as well armoured as a tank). I'm going to shave some other points by dropping some of the statistics that tanks get in Xenos Rampant, like Line Breaker and Close Assault.

LP(S)- Landing Pod (Support)

Or LP(G)? -Landing Pod (Gun)?


Or just call them Gunships?


The background is just some Jupiter wallpaper I found on line and I posed the miniatures in front of my computer screen. I had to use one of my flatter rock pieces on top of my painting water pot to get them high enough so that I could cut the Task Bar out of the bottom.


Sunday, April 2, 2023

Torpedoes Away! Night Action in The Slot

Sunday I decided to push Nimitz a bit and play a battle between two destroyer forces at night. When one considers how frequent these battles were in the Pacific, I'm surprised there is not a dedicated rules set for them.

I took the Battle of Cape St. George as inspiration. Two forces, each with 5 ships. The names aren't historically correct and the classes of Japanese destroyers aren't correct either. But I find Japanese destroyers rather confusing. The Japanese are divided into a Transport Force of 3 destroyers that had run reinforcements into Guadalcanal as part of the "Tokyo Express," and an escorting Covering Force of 2 ships.

As with my previous game, splash markers are tracking hits. Cotton puffs mark who is firing and explosions are for your benefit to show who is being sunk. All rather unnecessary for play, but I have the markers so I may as well use them.

In order to slow the damage down, I made all the destroyers armour 1, which reduced the results of the PEN table. Gunfire damage was still pretty bloody though, but I supposed quick firing 5" or 5.5" guns at close range will do that to you.

USN deployment area. DesRon1 leading. DesRon2 with  ships following.

DesRon2

DesRon1

The IJN won the Deployment roll so have the entire half of the table to set up on

Transport Force

Covering Force

Turn 1 maneuvers

USS The Sullivans is crippled by opening salvos. Even with only 2 guns that can come to bear, the Hayashiro gets a good PEN roll.

Turn 2. USN wins move-shoot first roll. Covering Force slows down to finish off The Sullivans. USS Nicholas maneuvers to flank the Covering Force and DesRon2 moves to concentrate US fire on Covering Force hoping to eliminate it.

The Sullivans gets some licks in but is sunk.

USS Nicholas in turn sinks Oyashio

Transport Force begins firing, distracting rear of DesRon2. Splitting DesRon1 to be able concentrate on one IJN ship has meant DesRon2 is now firing last

DesRon2 fires. 

Damage end of Artillery phase turn 1


Torpedo Phase. "FIRE ALL THE TORPEDOES!" Everyone has a firing solution on someone and no one holds back, launching all their torpedoes. DesRon2 moving at High Speed saves their bacon.

The warm Pacific night is shattered by exploding ships. Fletcher scores SIX hits on Hayashiro! Natsushio is hit 3 times, Nicholas and Hatsukaze twice. Fletcher, Chevalier and Kuroshio each take a hit and are crippled. Strong is lucky and is missed by all 8 torpedoes fired at her.

Turn 3. Fletcher and Chevalier limp away. Strong pursues Kuroshio who is trying to sneak away in the dark with only 1 hull box left.


Turn 4. A terrible stern chase in the dark! Kuroshio goes down, guns blazing in defiance, crippling Strong.

Yikes. The Emperor can't afford losses like this!

Oof. The Admiral is going to have some words to say.

I'm feeling more confident with the rules and I find them very quick and streamlined. Destroyers die pretty quickly but they can still do more than in Victory at Sea. 

I think by splitting the table, and using the Halsey campaign system, one could fight a big carrier battle fairly easily. 

Something to think about. 


Saturday, April 1, 2023

Battle Stations! Trying Nimitz


Lt. Cmdr Brayton, Captain of U.S.S Chevalier, stared hard at the columns of smoke where the New Orleans and Atlanta had been only minutes ago.
"Dear God," he crossed himself absent mindedly and then turned to the helm and his XO "bring us about and prepare to pick up survivors!"

So ended a swift, ruthless, and bloody first game of Nimitz.

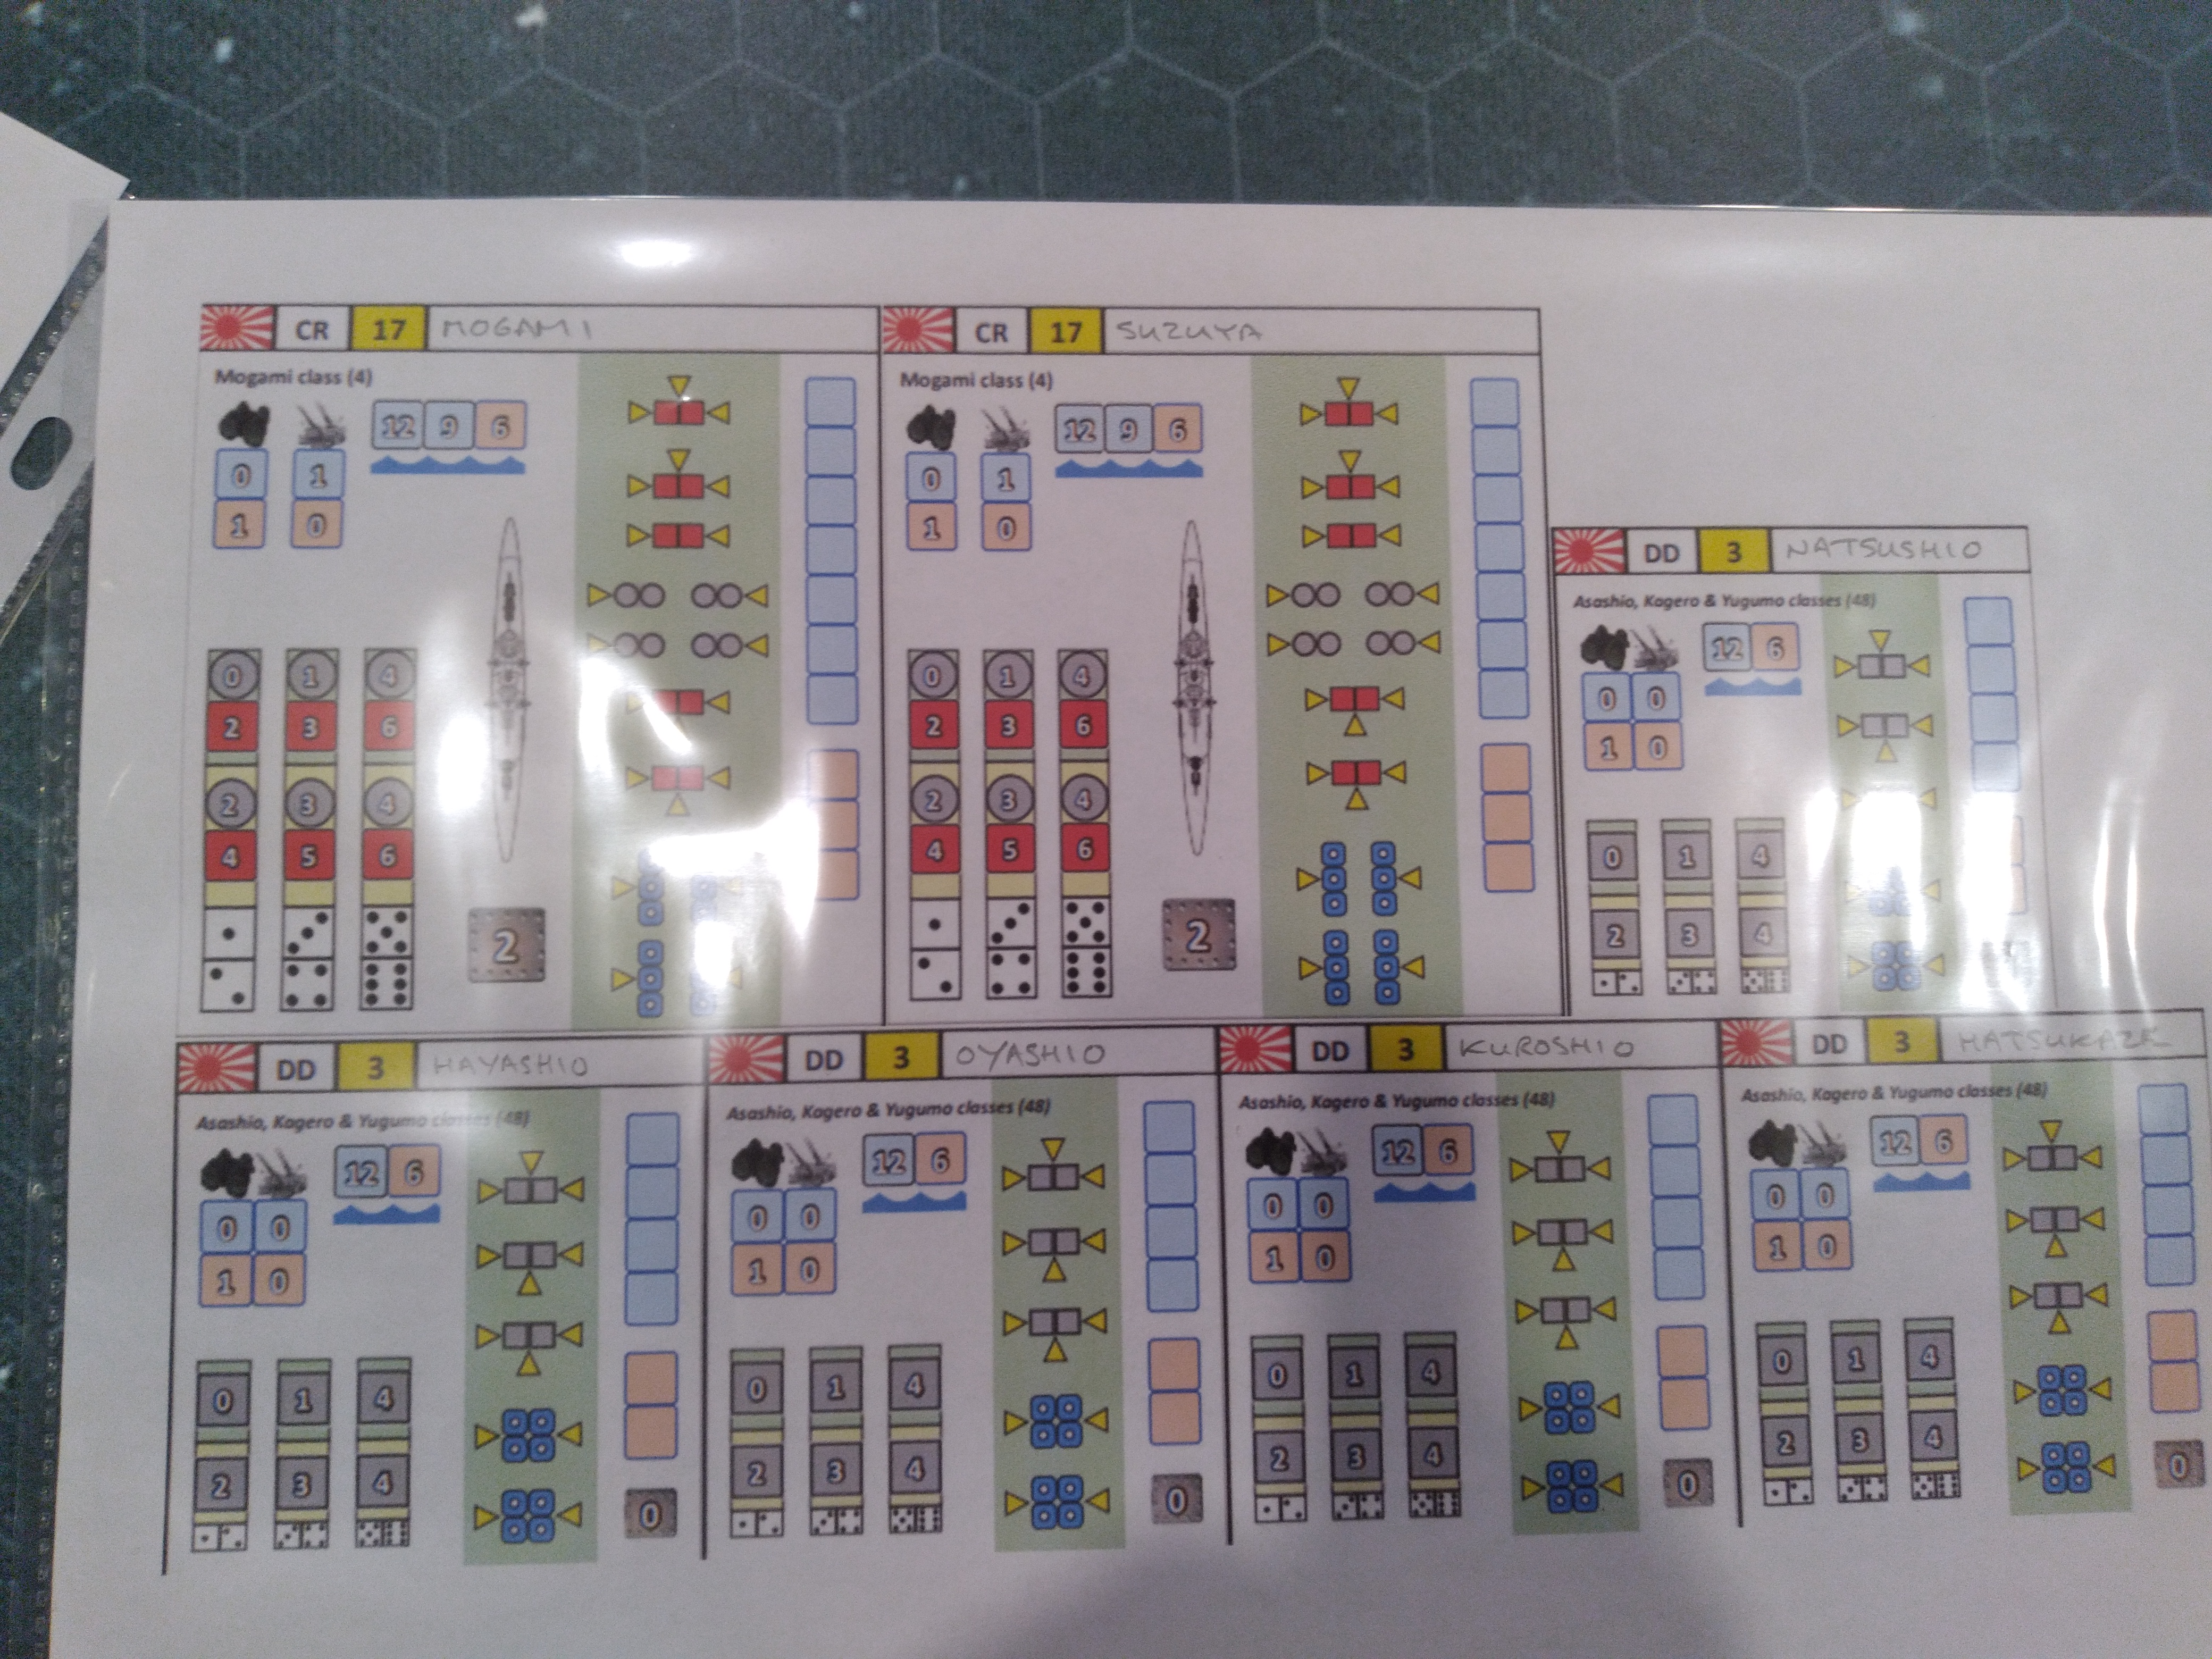
The fleet lists can be downloaded from here at Sam Mustafa's Honor store. I then copy and pasted assorted ship data cards into a Word document to print out.

I confess I did not have a plan, or order of battle. I was just thinking of the types of battles I had read about and would want to refight, so it was more like "Yeah, gonna need six Fletcher's, couple of 8" cruisers, a pair of Kongos, and which bloody Japanese destroyer types?"

You get the idea. 

Add to that how the graphics fit on the page and trying to maximize number of DCs per sheet. Fortuitously, I ended up with a sheet for each side that added up to equal points (49 points for each squadron). Although I'll have to scope out Staples and see what kind of at home laminating I can get so I can cut the DCs apart.

IJN squadron: 2x Mogami class heavy cruisers, 5x destroyers

USN squadron: 1x New Orleans class 8" cruiser, 1x Atlanta class 5" cruiser, 5x destroyers

I then followed the steps for set up. Both sides start with a 12"x12" deployment square and then roll for advantage. The IJN won the roll so the USN roll again for a second square and how it is oriented and this resulted in a deployment area 12' wide and 24" long extending into the middle of the table. They must deploy half of their ships in each square facing in the direction of the square orientation. So I put a destroyer squadron of 4 ships in the top square and the cruisers with one destroyer in the bottom. The IJN then get to deploy anywhere on their half of the table so long as they are not within 12" of an American ship. I put the cruisers in line, close, but off set, hoping they can cross the American T. The destroyers are further out to the flank so that they can swing in and fire off a volley of torpedoes.

Initial set up. USN on the right. Their deployment zone marked out by blue dice. IJN in two columns on the left.

Further rolls decided that it was day time and that the Americans had the advantage of moving first and then shooting first.

Players alternate movement. Ships or formations moving slowly (less than 6") move first, then medium speed (6-9"), then those moving fast (9-12"). Advantage player moves first in each instance, then disadvantaged. No one wanted to move slow. Americans passed on moving medium. IJN move their destroyers medium speed. USN then moves both squadrons at high speed. Both turn to port. The IJN cruisers, having passed on the opportunity to move slower, have to proceed a minimum of 9" to cross the American bows.

The cotton wool to designate firing, splash markers and explosion markers are just used to help me keep track of what was going on and for visual effect in the photographs. Because Rule of Cool, right?

Secondary batteries firing. The IJN cruisers have close range shots at the leading destroyers

The Fletcher has been crippled by the Suzuya and the Strong sunk by the Mogami's secondary batteries.


Return fire now with main batteries

New Orleans gets four solid hits on the Suzuya, sinking her


The Mogami returns fire, smashing the New Orleans

The Fletcher scores four hits with it's 5" guns, and one penetrates the armour, thereby getting the last structural hit needed to sink the Mogami

The IJN destroyers now fire a full broadside, concentrating on the lead USN destroyer. The Fletcher disappears under a storm of shell splashes


After artillery, comes the torpedo phase. The Americans do not have a firing solution for their torpedoes. The Japanese however do, and with the Type 21 torpedo they have the Americans within range too!

The lead destroyers can only fire at the American destroyer squadron. Each fires a spread of 4 torpedoes. All miss. The last three destroyers have an angle on the Atlanta and each fires four torpedoes. 

At long range they need 6s to hit. Two strike home!

A die is rolled for each torpedo hit and added to the torpedo value of the nationality. The IJN ship launched torpedoes have a value of 5. Beat the armour and you inflict a buoyancy hit. Beat the armour of the target by 6 and you've broken it's keel, sinking her immediately.
Atlanta goes down


After one turn I declared this a Japanese tactical victory. The last minute sinking of the Atlanta definitely tipped the score.
So far, I'm impressed. Using formations makes sense. Destroyers can do things. Firing is quick to resolve, and very bloody, especially if you roll a couple of 6s on your penetration dice. And there isn't the endless rolling on numerous damage charts just to find out that you've only knocked out the coffee maker in the galley.