Finally had the boys over for a game last night. Seven Year's War using
Black Powder in 15mm. This was the first time that both sides were provided entirely by me. So I guess I've achieved
New's Resolution #2 (sort of). My Austrians and Bavarians were snuggled in behind a line of entrenchments defending a bridgehead.
 |
| Austro-Bavarian deployment |
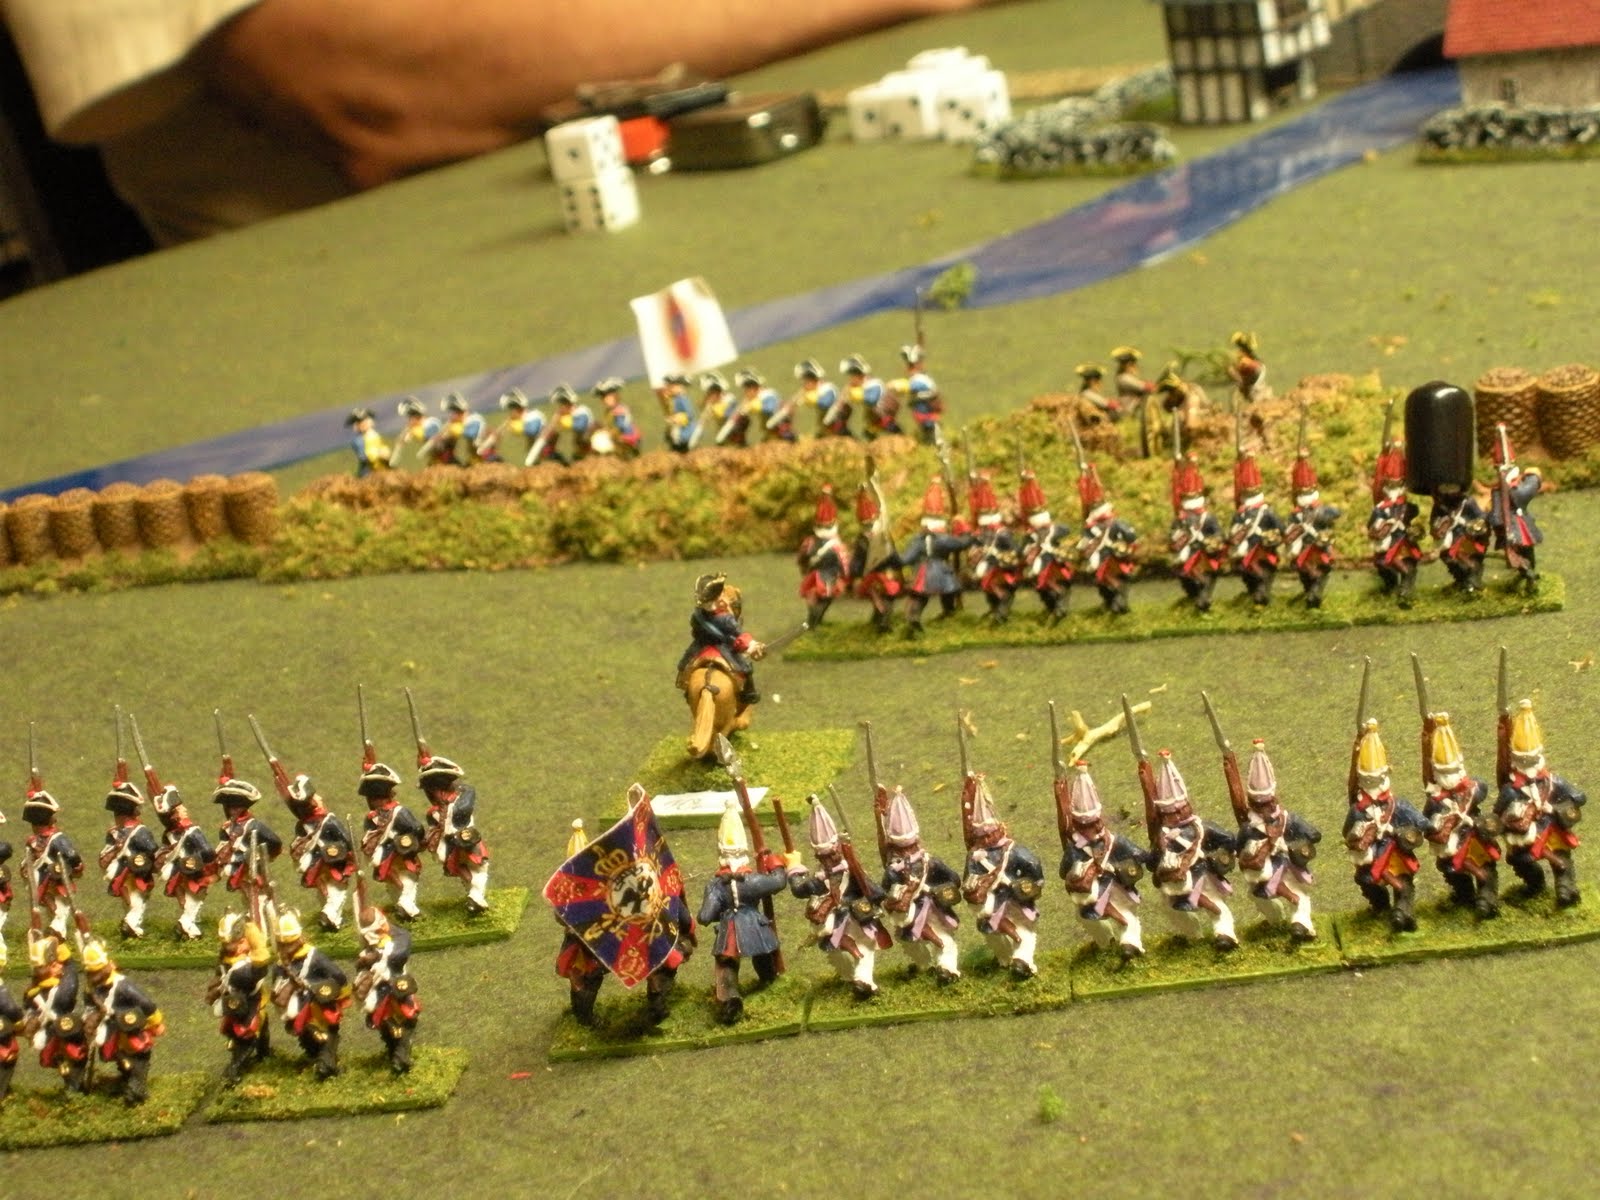
The allied army had 11 battalions of infantry, 8 squadrons of cavalry and 4 guns. The Austrians held the left with the Pandours outside the entrenchments and the Bavarians were on the right. The cavalry were stationed in the woods to the right of the town outside the entrenchments. One lone battalion of Bavarian grenadiers were kept as a reserve.
I thought that 2:1 odds were appropriate to the scenario, so I gave the Prussian players all of my Prussian infantry and equal amounts of cavalry.
 |
Prussian view of allied redoubt
|
The Prussians threw the Freikorps out to their right to oppose the Pandours, massed their guns on the road opposite the redoubt and sent their cavalry off to their left along with a brigade containing both battalions of grenadiers.
 |
| Prussian advance |
 |
| Prussian massed battery |
The Prussian commander on the right advanced aggressively to outflank the pandours who, hampered by bad command rolls, got stampeded back to the line of earthworks. The Freikorps brigade tried to carry the entrenchments with the bayonet and some fierce combats erupted along the line.
 |
| Chasing Pandours |
 |
| Freikorps storm the earthworks! |
On the far right the Von Kleist Freibattalion drove the whitecoats out of the earthworks but were so shaken in the process they didn't advance any further. To their left the Austrians drove off the Prussians. The second battalion of Pandours finally bestirred themselves to advance from their position by the river to harass the Prussian flank, eliminating one of the retreating freibattalions.
 |
| Situation on Prussian right. Pandours bestir themselves. |
In the Prussian center, two brigades supported by the massed artillery threw themselves at the line of earthworks. Austrian musketry threw back two charges.
But one battalion of musketeers gained a foothold, pushing the Austrian defenders back into the town.
A battalion of fusiliers quickly exploited to outflank the Austrian battery who pulled back out of their redoubt leaving the grenadiers open.
 |
| Exploiting the foothold. |
The Prussian artillery had by this time (due to a 'blunder' roll) advanced into medium range where their shot became more telling. A devastating salvo on a battalion of Bavarians, coupled with abysmal saving rolls, resulted in a breach being blown in the lines.
 |
| Breach blown in line of earthworks! |
Meanwhile on the Austrian right the cavalry sallied out to threaten the Prussian flank and attempt to draw off some pressure. The Prussian cavalry deployed to face, but then both brigades ground to a stop due to bad command rolls.
 |
| Cavalry threaten each other with little effect. |
The Prussian left wing launched an attack on their sector led by the Guard Grenadiers.
 |
| Guard Grenadiers storm a redoubt. |
On the next Prussian turn a highly successful command roll had two more battalions pour in with three moves to widen the breach made.
This didn't stop the Prussians from pouring on the pressure in the center though.
The Austrian grenadier battalion defended bravely without any support, driving off another charge and forcing the next battalion of Prussians into
three rounds of hand to hand before there was a decision.
 |
| Grenadiers finally break and the redoubt is stormed from front and back. |
But when you roll snake eyes for the eventual break test there isn't much that can be done about it.
The climax came with the Prussians enveloping the main redoubt by pushing two battalions through the breach and then Gen. Schwerin leading his battalion in person over the earthworks through a storm of pretty ineffective grapeshot.
By this time the Austrian defenses were pierced in three places, all three redoubts were taken and they had lost three of four guns, plus suffering about 50% casualties. The Prussians had lost one or two battalions.
I probably messed up some things again, but considering all the socializing that went on (we don't get to see other much), a lot of gaming still managed to happen. I should probably make some rosters for each army and put stickies on each command stand though to help my less SYW-savvy friends. I noticed the Prussians kept leading their attacks with Garrison battalions!


Sorry I didn't make it - lookslike a good time was had by all!
ReplyDeleteKeith
Great report and photo's, well done that man!!!
ReplyDeleteNice setup and figures as well as AAR. What I may suggest is changing those black plastic markers with something less conspicous
ReplyDeleteThe casualty caps aren't ideal, but they were free. I plan on buying the big bag of casualties from Battle Honours/Old Glory 15s.
ReplyDeleteExcellent Battle report and wonderful pictures!
ReplyDeleteVery much enjoyed reading the report and seeing the pictures. Great game.
ReplyDeleteBut I'm afraid I agree with Invictus - the casualty markers have to go! I use the tiny size of dice to record casualties, with a different colour for just casualties, shaken and disordered. Haven't got the patience to paint dead soldiers!
Thanks for posting this up. Cheers, Keith.
My group are pretty bad for either forgetting to move the small casualty dice with their units or even picking them up to roll!
ReplyDeletePerhaps numbered chits would be less intrusive?